privatestaticvoidSetGlobalGBufferCaptureMode(GBufferCaptureModecaptureMode){// Enable the specific keyword based on capture modeswitch(captureMode){caseGBufferCaptureMode.WorldPosition:Shader.EnableKeyword("_GBUFFER_WORLDPOS");Shader.DisableKeyword("_GBUFFER_NORMAL");break;caseGBufferCaptureMode.Normal:Shader.DisableKeyword("_GBUFFER_WORLDPOS");Shader.EnableKeyword("_GBUFFER_NORMAL");break;caseGBufferCaptureMode.Albedo:Shader.DisableKeyword("_GBUFFER_WORLDPOS");Shader.DisableKeyword("_GBUFFER_NORMAL");break;}}// 对于每个Probe执行下面的代码SetGlobalGBufferCaptureMode(GBufferCaptureMode.WorldPosition);camera.RenderToCubemap(_worldPosRT,-1,StaticEditorFlags.ContributeGI);SetGlobalGBufferCaptureMode(GBufferCaptureMode.Normal);camera.RenderToCubemap(_normalRT,-1,StaticEditorFlags.ContributeGI);SetGlobalGBufferCaptureMode(GBufferCaptureMode.Albedo);camera.RenderToCubemap(_albedoRT,-1,StaticEditorFlags.ContributeGI);
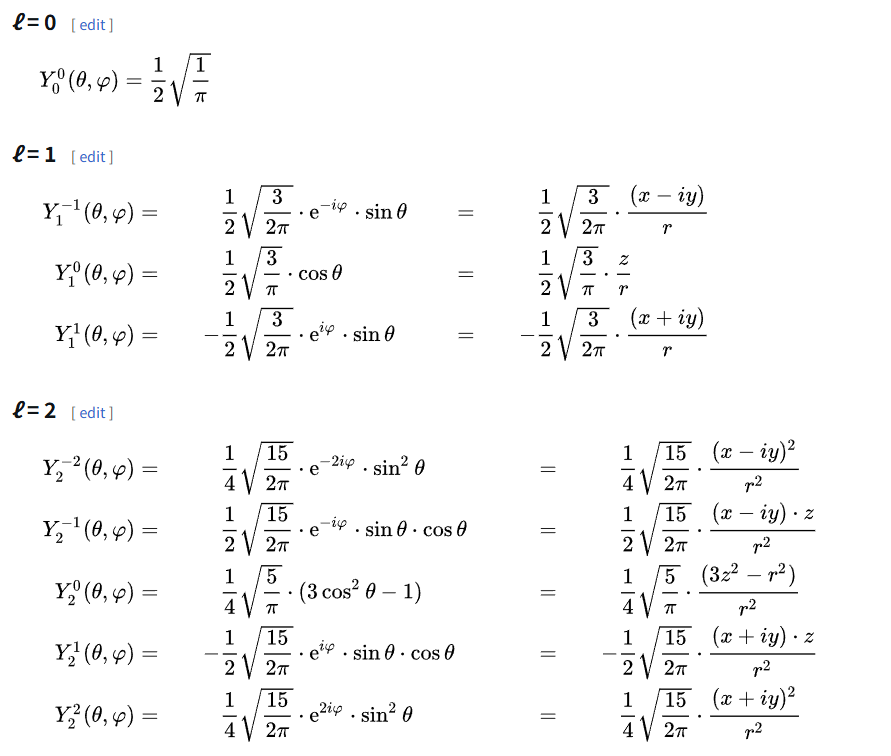
// 新版本 - 向量化计算voidEvaluateSH9(infloat3dir,outfloatsh[9]){// Cartesian (right-handed, Z up) coordinate.floatx=dir.x;floaty=dir.z;floatz=dir.y;// L0 (constant)sh[0]=1.0;// Constant term (will be multiplied by kSHBasisCoef[0])// L1 (linear)sh[1]=y;// Y_1_-1sh[2]=z;// Y_1_0sh[3]=x;// Y_1_1// L2 (quadratic)sh[4]=x*y;// Y_2_-2sh[5]=y*z;// Y_2_-1sh[6]=3.0*z*z-1.0;// Y_2_0 (Equals 2.0 * z * z - x * x - y * y)sh[7]=x*z;// Y_2_1sh[8]=x*x-y*y;// Y_2_2// Apply kSHBasisCoef to get the final SH basis values[unroll]for(inti=0;i<9;++i){sh[i]=sh[i]*kSHBasisCoef[i];}}// 优化后的使用方式floatshCoeffs[9];EvaluateSH9(dir,shCoeffs);// 一次计算所有系数[unroll]for(intshIndex=0;shIndex<9;shIndex++){contribution=shCoeffs[shIndex]*totalRadiance*4.0*PI/SampleCount;// 直接数组访问,无分支判断}
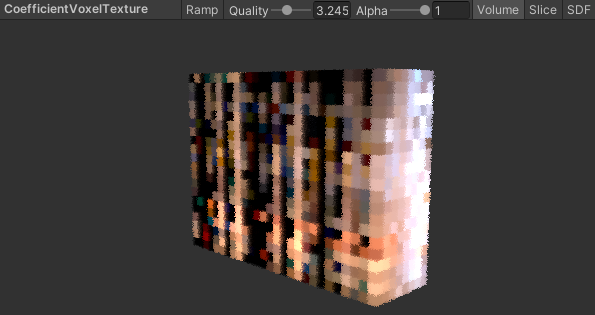
voidDoRelight(CommandBuffercmd,PRTProbeVolumevolume){volume.SwapCoefficientVoxels();// 如果是多帧Relight,则不需要清空体素if(!multiFrameRelight)volume.ClearCoefficientVoxel(cmd);// May only update a subset of probes each frameusing(ListPool<PRTProbe>.Get(outvarprobesToUpdate)){volume.GetProbesToUpdate(probesToUpdate);foreach(varprobeinprobesToUpdate){probe.ReLight(cmd,_relightCS,_relightKernel);}}// Advance volume render framevolume.AdvanceRenderFrame();}// 滚动获取当前帧要更新的ProbepublicvoidGetProbesToUpdate(List<PRTProbe>probes){for(inti=_currentProbeUpdateIndex;i<_currentProbeUpdateIndex+probesToUpdateCount;i++){probes.Add(Probes[i]);}}publicvoidAdvanceRenderFrame(){// Advance the update index for next frame_currentProbeUpdateIndex=(_currentProbeUpdateIndex+probesToUpdateCount)%Probes.Length;}
/// <summary>/// Update local probe indices based on camera position/// </summary>privatevoidUpdateLocalProbeIndices(){if(!_mainCamera||Probes==null||Probes.Length==0)return;Vector3cameraPos=_mainCamera.transform.position;// Only recalculate if camera has moved significantlyif(Vector3.Distance(cameraPos,_lastCameraPosition)<CameraMovementThreshold)return;_lastCameraPosition=cameraPos;_localProbeIndices.Clear();// Convert camera position to probe grid coordinates for more efficient distance calculationVector3gridPos=(cameraPos-transform.position)/probeGridSize;// Calculate distances from camera to all probes using grid coordinatesusing(ListPool<(intindex,floatdistance)>.Get(outvarprobeDistances)){for(inti=0;i<Probes.Length;i++){if(Probes[i]){// Calculate probe position in grid coordinatesVector3probeGridPos=(Probes[i].transform.position-transform.position)/probeGridSize;// Use squared distance for efficiency (avoiding sqrt)floatsqrDistance=(gridPos-probeGridPos).sqrMagnitude;probeDistances.Add((i,sqrDistance));}}// Sort by distance and take the closest onesprobeDistances.Sort(static(a,b)=>a.distance.CompareTo(b.distance));intcount=Mathf.Min(localProbeCount,probeDistances.Count);for(inti=0;i<count;i++){_localProbeIndices.Add(probeDistances[i].index);}}}
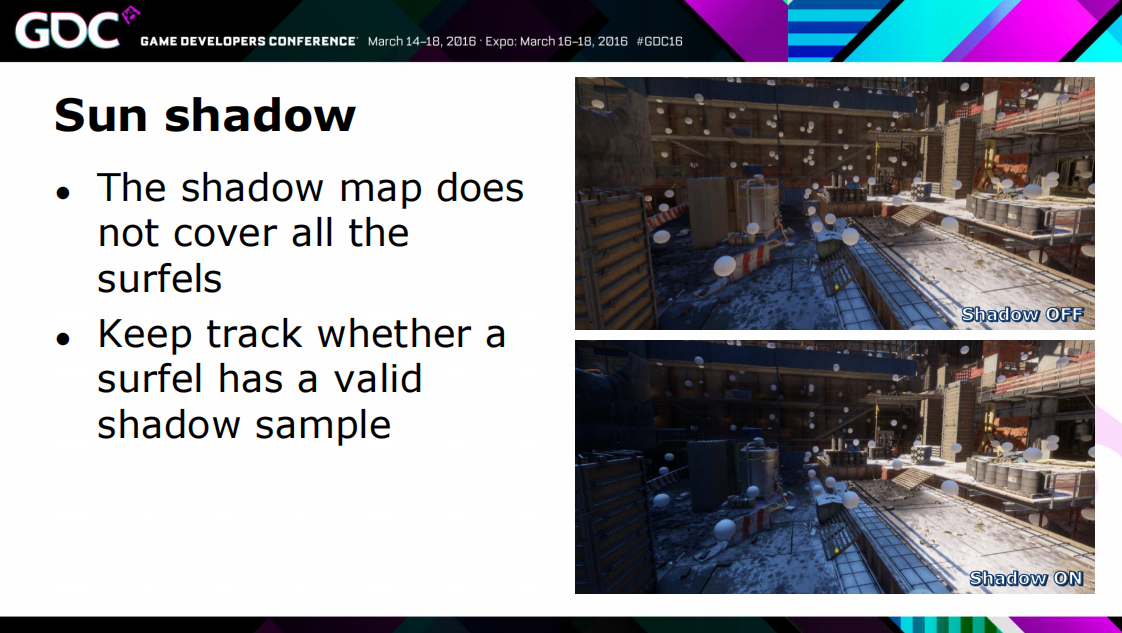
// mainlight shadowfloat4shadowCoord=TransformWorldToShadowCoord(surfel.position);if(!BEYOND_SHADOW_FAR(shadowCoord)){// Shadow is valid, sample and update cacheatten=SampleShadowmap(TEXTURE2D_ARGS(_MainLightShadowmapTexture,sampler_MainLightShadowmapTexture),shadowCoord,GetMainLightShadowSamplingData(),GetMainLightShadowParams(),false);// Update shadow cache with new valid result_shadowCache[surfelGlobalIndex]=atten;}else{// Shadow is invalid, use cached result if availableatten=_shadowCache[surfelGlobalIndex];}
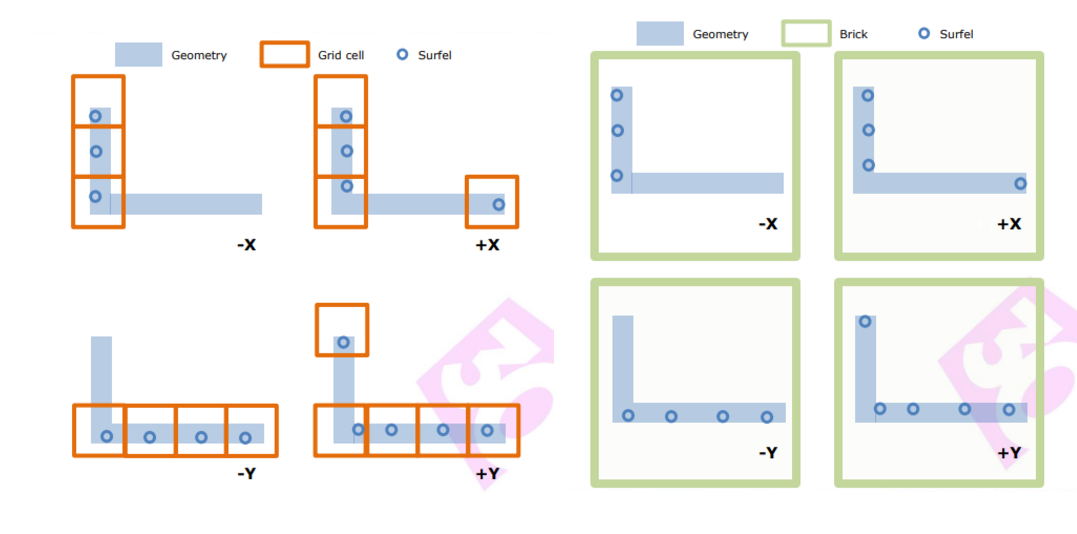
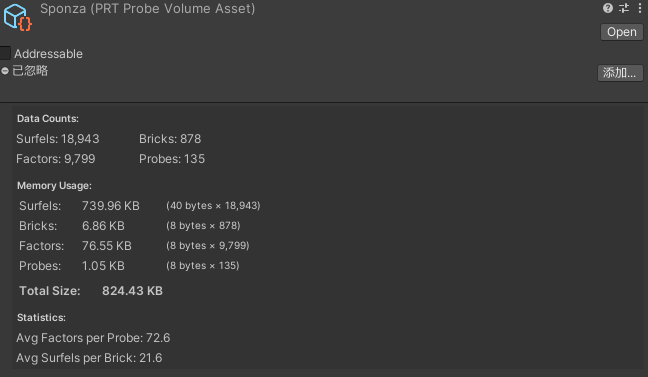
/// <summary>/// Represents the indices of a Surfel/// </summary>[Serializable]publicstructSurfelIndices{publicintstart;publicintend;}/// <summary>/// Represents a 4x4x4 brick containing merged Surfels/// </summary>publicclassSurfelBrick{publicreadonlyList<int>SurfelIndices=new();publicreadonlyHashSet<PRTProbe>ReferencedProbes=new();}
/// <summary>/// Factor structure: contains Brick index and the contribution weight of that Brick to the Probe/// </summary>[Serializable]publicstructBrickFactor{publicintbrickIndex;publicfloatweight;}/// <summary>/// Factor range: each Probe stores the range of Factors it uses/// </summary>[Serializable]publicstructFactorIndices{publicintstart;publicintcount;}
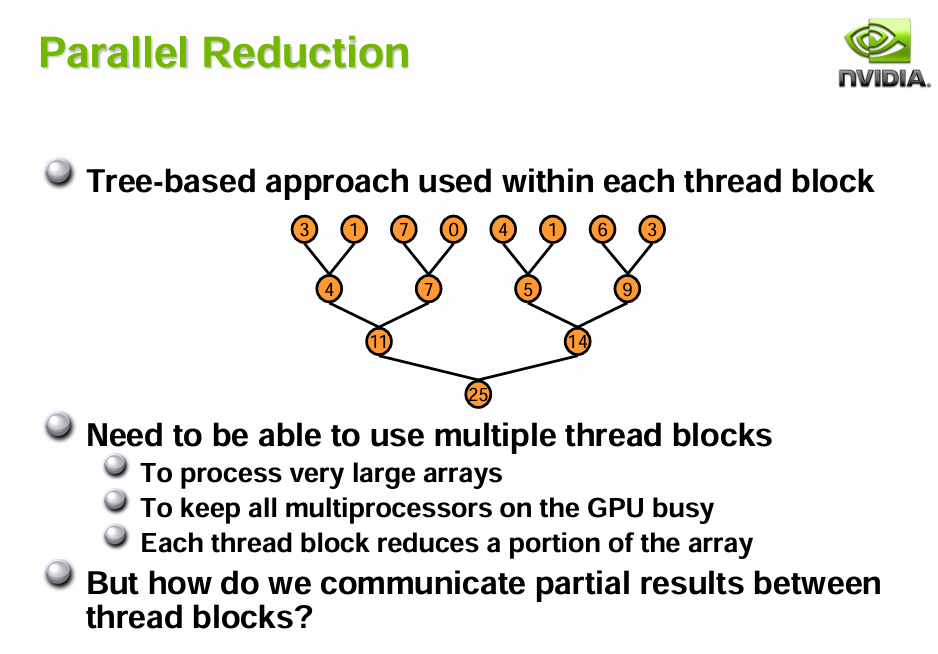
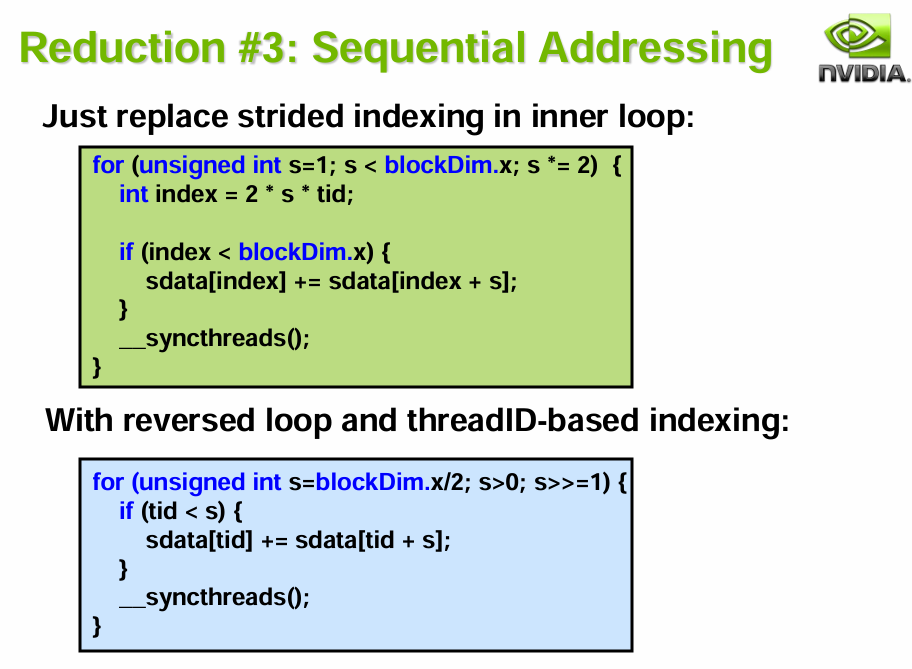
#define ThreadCount 256 // Max Brick Numgroupsharedfloat3groupCoefficients[9][ThreadCount];// Compute all SH coefficients at once using vectorized approachfloatshCoeffs[9];EvaluateSH9(dir,shCoeffs);floatweight=4.0*PI/sampleCount;// Process each SH coefficient and store to LDSUNITY_UNROLLfor(intshIndex=0;shIndex<9;shIndex++){float3contribution=shCoeffs[shIndex]*totalRadiance*weight;groupCoefficients[shIndex][groupIndex]=contribution;}GroupMemoryBarrierWithGroupSync();// Parallel reduction for non-power-of-2 sizefor(uintstride=ThreadCount/2;stride>0;stride>>=1){if(groupIndex<stride){UNITY_UNROLLfor(intshIndex=0;shIndex<9;shIndex++){groupCoefficients[shIndex][groupIndex]+=groupCoefficients[shIndex][groupIndex+stride];}}GroupMemoryBarrierWithGroupSync();}